I make my art quilts using a variety of design processes. Some of them are done
in collaboration with others, some free form working on my design wall, some are
initially designed on the computer, and some follow a "recipe" approach. Below I
will describe the recipe approach as I made one specific piece.
Many years ago, I participated in Q-xchg an exchange of fabric
and blocks that was part of the e-mail list, Quiltnet. One of the exchanges
was to make and receive Mariner's Compass blocks. Below is my block:
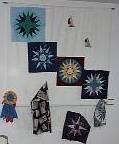
 From the
exchange, I received four other compass blocks along with my original block. Through a friend,
I received one other compass block. So, now I had six blocks and
didn't know what to do with them.
From the
exchange, I received four other compass blocks along with my original block. Through a friend,
I received one other compass block. So, now I had six blocks and
didn't know what to do with them.
Then, I read
Design
Your Own Quilts by Judy Hopkins (no longer in print, but used copies can
sometimes still be located). A light bulb went off. I call this a recipe
approach as you work with a number of focus blocks, a number of supporting
blocks (blocks that have more than 8 pieces but are not as complex as the theme
blocks) and a number of filler blocks (generally less than 8 pieces). In
addition to the compass blocks, I had a few embroidered sailboat blocks. And, on a trip to Washington state,
I
found an interesting Japanese inspired fabric with wood blocks by Hokusai.
 The
recipe approach requires identifying a square measurement that all the pieces
have in common (such as 4 inches or 6 inches) to determine the basic unit size.
After you have done that, you determine how many "units" are your theme areas
(in this case, I had 30 units). Based on the number of focus "units" you have,
you will develop your quilt. In general, you make twice as many filler blocks as
you have focus units (in my case, that was 60) and the same number of supporting
blocks as focus units (30). If you have a high "unit" number, you may not make
all the filler blocks or supporting blocks at one time. You'll make about 5 or
10 units more than the number of focus units (so, in this case, 35 to 40 units)
of the filler blocks and then make a few less than the number of focus units
(so, 20 to 25) of the supporting blocks. After that point, you start playing
with the blocks in a large design space.
The
recipe approach requires identifying a square measurement that all the pieces
have in common (such as 4 inches or 6 inches) to determine the basic unit size.
After you have done that, you determine how many "units" are your theme areas
(in this case, I had 30 units). Based on the number of focus "units" you have,
you will develop your quilt. In general, you make twice as many filler blocks as
you have focus units (in my case, that was 60) and the same number of supporting
blocks as focus units (30). If you have a high "unit" number, you may not make
all the filler blocks or supporting blocks at one time. You'll make about 5 or
10 units more than the number of focus units (so, in this case, 35 to 40 units)
of the filler blocks and then make a few less than the number of focus units
(so, 20 to 25) of the supporting blocks. After that point, you start playing
with the blocks in a large design space.
Because the Mariner's Compass blocks use a variety of colors, but all had some
blue, I chose a variety of blue fabrics
that were different tones and textures and included other colors to
some degree. My "units" were 6 inch blocks.
The recipe approach suggests creating a number of filler blocks. For my simple blocks,
I used three designs: solid squares,
the hourglass and the
four patch. The hourglass blocks were a variety of lights to darks. The four
patches were a few lights and a few darks. My supporting blocks
were pinwheels and four patch within a four patch. My pinwheels were
largely mediums to darks. My four patch within a four patch were lights
to mediums. At this point, my small design wall was too small
so I had to lay out the quilt in progress on the floor.
Then I needed to fill in the design. By making a few more of the filler blocks
and a few more of the supporting blocks, you fill in the design. For my filler
blocks, I made some half square triangles in using lights, mediums and darks and
I also added a few more solid squares. For a few more supporting blocks, I made
a few more pinwheels and some Bird in the Windows. To finally fill things in, I
made a couple of hourglasses, a modified pinwheel and a few more four patches.
And that's how the recipe works.
After completing the bulk of the top,
I needed to figure out borders. Because there was a very yellow compass in the
blocks, I added yellow to the border. For the yellow
to stand out against some of the light areas, I added first a small
dark blue border. Then I continued some of the angles of color by
fracturing the outer border.
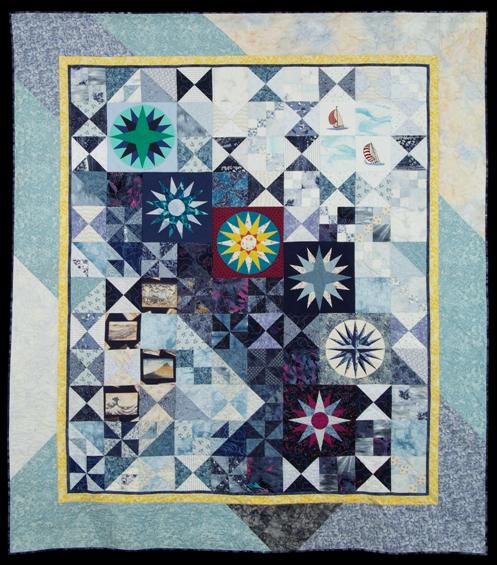
The quilt measures 80 inches by 92 inches.
Quilt in private collection.
I have used this recipe approach a number of times. You can see these other
quilts in the gallery section (both the
Asian and
African series).